You have three ways to format the text in your cell with the wrap feature in Google Sheets on the web. In the mobile app, you can use the basic wrap format to see your text more easily.
How to Wrap Text in Google Sheets on the Web
Visit Google Sheets on the web, sign in, and open the workbook and sheet you want to use. Select the cell containing the text you want to wrap and do one of the following:
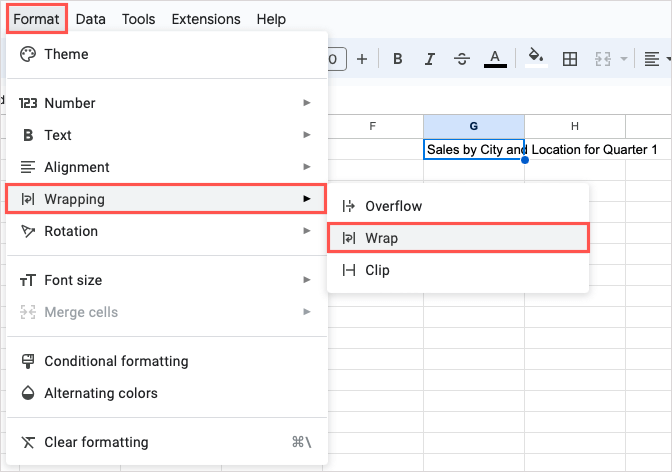
Pick Format > Wrapping in the menu to display the pop-out menu. Use the arrow next to the Text Wrapping icon in the toolbar to display the options.
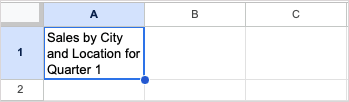
Then, select Wrap. You see the text in the cell carry down to the next line and the cell automatically lengthen to accommodate the text. You’ll also notice the height of that entire row change. If you decide to change the column width, the length of the cell automatically adjusts. This shortens the cell so that the text string fits perfectly inside. Again, you’ll see the whole row height adjust.
Wrap All Text in a Sheet
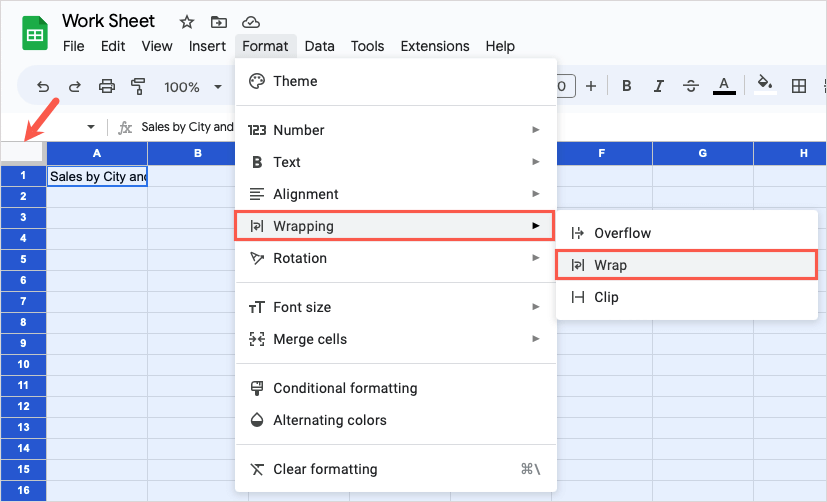
To set all cells to wrap text you enter, use the Select All button (square between column A and row 1) to select the entire sheet.
Then, pick Format > Wrapping > Wrap or use the Wrap Text button the toolbar and pick Wrap.
Once you do this, any existing data or future data you enter into your spreadsheet will automatically wrap to a new line which is a great way to save time in Google Sheets.
Other Text Wrapping Options
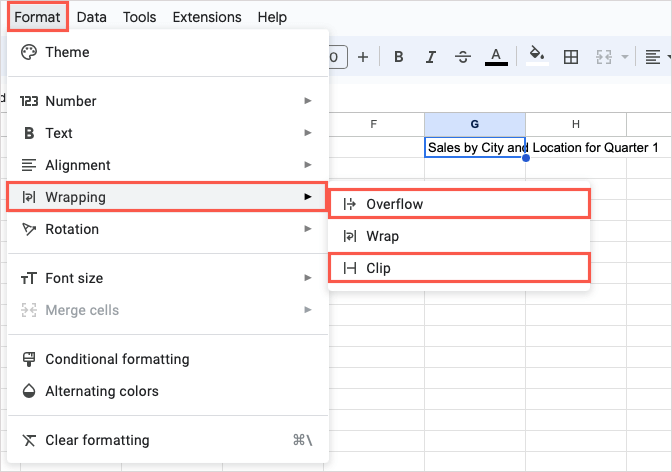
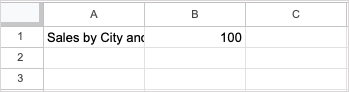
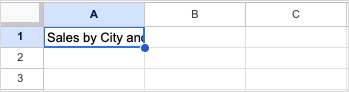
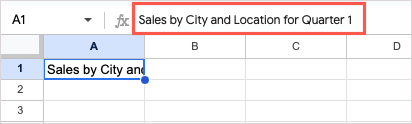
In most cases, the wrap text option above best accommodates long strings of text in cells. It allows you to see all of the data without resizing or even merging cells. However, if you find that the feature doesn’t work for your particular sheet, you can choose the Overflow or Clip option in the Wrapping menu. Overflow: The text in the cell spills over into the adjacent cells to the right. In the screenshot below, you can see the text in cell A1 carries over to cells B1 and C1. This is fine if the next cell to the right is blank, but if it contains data then the text in the cell to the left will be cut off as shown here. Clip: The text in the cell is cut off at the cell border. This looks similar to the Overflow option when the cell to the right contains data. If you go with the Overflow or Clip option, you can always see the entire cell contents by selecting the cell and looking at the Formula Bar. If you don’t see the Formula Bar at the top of your sheet, select View > Show > Formula bar to display it.
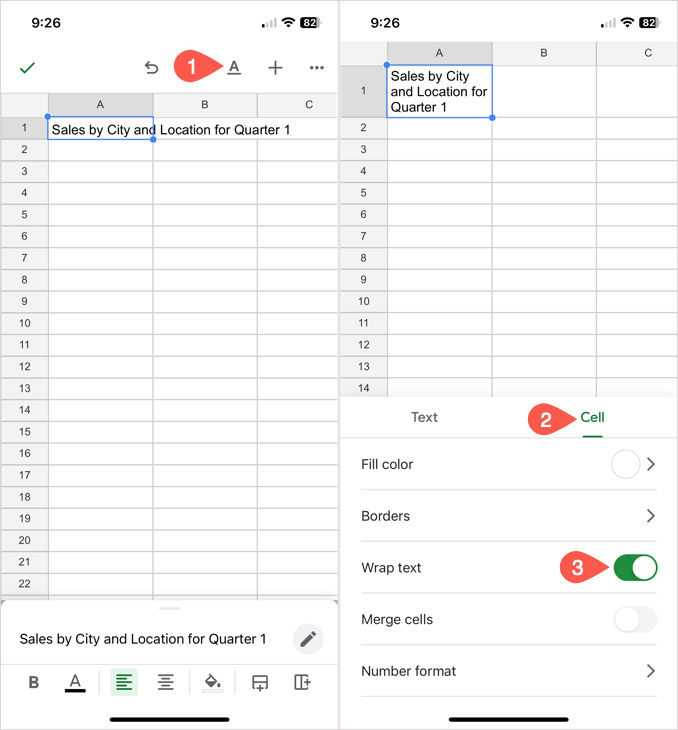
How to Wrap Text in Google Sheets on Mobile
In the Google Sheets mobile app, you have one option to wrap text which is the same as the Wrap feature described above. The cell containing the data automatically resizes to accommodate the text which wraps to the next line. You can then close the Format menu and continue working in your sheet.
Make Your Text Easy to See
By wrapping text in Google Sheets, you’ll be able to view the entire contents of a cell without lifting a finger.
For similar tutorials, look at how to insert and use bullet points in Google Sheets for an organized way to format your text.